|
 Topic: Project::Repairing My Damp Abi Dawnstar Topic: Project::Repairing My Damp Abi Dawnstar
|
  |
04/8/2010 at 10:03am
Location: None Entered
Outfit: None Entered
 View Profile
 Reply
Reply
 Quote
Quote
|
Joined: 04/8/2010 Standard Member
Forum Posts: 27
| Site Reviews Total: | 0 |
|
| Site Reviews 2024: | 0  |
| Site Reviews 2023: | 0  |
| Site Reviews 2022: | 0  |
| Site Reviews 2021: | 0  |
| Site Reviews 2020: | 0  |
| Site Reviews 2019: | 0  |
| Site Reviews 2018: | 0  |
|
| Site Nights 2024: | 0 |
| Site Nights 2023: | 0 |
| Site Nights 2022: | 0 |
| Site Nights 2021: | 0 |
| Site Nights 2020: | 0 |
| Site Nights 2019: | 0 |
| Site Nights 2018: | 0 |
|
Hi all, i'm new to the forum but after reading many posts on the subject, I am ready to start repairing the damp on my van.
Right, I have a 1985 Abi Dawnstar, I decided to buy a caravan this year for the first time to give it a go, we only had a small budget and the vans we looked at were all in the £500 range, for this money I knew we were not going to get a mint condition van with no problems, I looked around a few and found this one, I could see it had a bit of damp but decided to buy it, mainly being I could have it for £300, and could become my little project over the next couple of months.
So after through inspection/prodding I found that the damp was in the left handside front wall(looking from the front), extending accross the front window. I also found one or two soft spots (only small patches, hand sized) in other areas which I have marked.
Here is a little diagram of damp areas:

As you can see the majority of the damp is around the front left(looking from outside) window, around the grab handle and accross the top of the front window(its just one big window that does not open).
My Plan:
We go on holiday in about 3 weeks so I need to make sure the van is water tight and safe to tow, so I am going to repair the red patches and reseal every external rail.
I aim to keep this thread updated with photos as I go and would greatly appreciate any help/advice.
As the main damp is around the grab handle left window and front top window am I right in jumping to the conclusion that the front window rail, side window rail, grab handle and corner awning rail are probably causing this issue?
So the order in which I will carry out my jobs will be the following:
Job 1-Remove and reseal rails 1 at a time, remove the screws and rail, clean off any exisiting mastic(if any), apply 19mm mastic roll, fill screw holes with cartridge mastic, add a bead off sikaflex 221 to rails, re-apply smooth over any sealant that has come out.
Job 2-Remove left hand side bench and cupboards( the benches are riveted to the floor so is the best form of removal to drill the rivet? And when re-fixing to use a sutable sized self tapper?). Remove 3mm plywood and inspect damage, dry and treat timbers that are savable, replace any that are not, re-apply insulation with sikaflex 221, reapply wall with 3.6mm marine ply from wickes again with sikaflex 221.
Job 3-Have my holiday
Job 4-Remove and dry out/replace front window, and any other damp patches that have not remied themselves by the full reseal.
Right I have a couple of questions.
1.When I remove the left side wall around the left window, if the frame is knackered, is it just a case or jig-sawing another one out of suitable wood/plyboard sandwich to the right thicknes? (I have a brand new rubber seal to apply after repair/replacement).
2.What is the easiest way to get to the roof rail in the middle of the roof?
3.If I have to strip the front of the van out due to damp, has anyone done this? Whats the construction like round there as its plastic at the front and not alu?
4.When walking on the floor, if I look underneth, I do see the floor bow, only 5-6mm, is this normal? It doesnt feel spongy on the floor when walking?
Well thanks for reading (if you got this far), and I will keep you updated on my progress with pictures as I progress (just got to wait for ebay to deliver my mastic etc.)
I'm estimating 40-50hrs of work, in the evenings and weekends, i'm sure I will have it ready in 3 weeks 
Feel free to leave any comments, hints and tips.
Post last edited on 04/08/2010 10:28:09
Post last edited on 04/08/2010 10:29:47
Post last edited on 04/08/2010 10:30:09
Post last edited on 04/08/2010 10:31:24
Post last edited on 04/08/2010 10:36:51
|
04/8/2010 at 11:53am
Location: None Entered
Outfit: None Entered
 View Profile
 Reply
Reply
 Quote
Quote
|
Joined: 04/8/2010 Standard Member
Forum Posts: 27
| Site Reviews Total: | 0 |
|
| Site Reviews 2024: | 0  |
| Site Reviews 2023: | 0  |
| Site Reviews 2022: | 0  |
| Site Reviews 2021: | 0  |
| Site Reviews 2020: | 0  |
| Site Reviews 2019: | 0  |
| Site Reviews 2018: | 0  |
|
| Site Nights 2024: | 0 |
| Site Nights 2023: | 0 |
| Site Nights 2022: | 0 |
| Site Nights 2021: | 0 |
| Site Nights 2020: | 0 |
| Site Nights 2019: | 0 |
| Site Nights 2018: | 0 |
|
Quote: Originally posted by wizard9956 on 04/8/2010
What day are you going to start your repair .
atb
Wizard
Aslong as my materials arrive I will be starting tommorrow, as I have a full day off, is it best to reseal the outside first or work on th inside?
Many Thanks
|
04/8/2010 at 6:36pm
Location: Bristol
Outfit: Lunar Conquest 544 a
 View Profile
 Reply
Reply
 Quote
Quote
|
Joined: 25/9/2004 Diamond Member 
Forum Posts: 7531
| Site Reviews Total: | 0 |
|
| Site Reviews 2024: | 0  |
| Site Reviews 2023: | 0  |
| Site Reviews 2022: | 0  |
| Site Reviews 2021: | 0  |
| Site Reviews 2020: | 0  |
| Site Reviews 2019: | 0  |
| Site Reviews 2018: | 0  |
|
| Site Nights 2024: | 0 |
| Site Nights 2023: | 0 |
| Site Nights 2022: | 0 |
| Site Nights 2021: | 0 |
| Site Nights 2020: | 0 |
| Site Nights 2019: | 0 |
| Site Nights 2018: | 0 |
|
Hi Jon , glad you've changed your mind and are starting on the inside first , remove the damp wall board then assess the wall battens , see which ones have rotted , remove them , dry the area , replace with new battens . ( note some of the battens will have the screws from the awning rails going into them so at some stage you'll have to remove the awning rail to get the old batten off , replace when doing the awning rail reseal ) .
Do not try to do too much in one go , do small repairs first and get used to the process of doing it .
Do cover the caravan outside when doing your repairs so no water gets in .
Remember that furniture helps the structure of the caravan stay rigid , taking out too much in one go isn't a good idea ( i think in your case you'll be ok doing it in one go but just be aware when removing ).
Use plywood not hardboard .
Replys to questions in first post .
1 , you should find the left window frame is just straight battens so replacement will be straight forward .
2 , there's not a easy way that i know of .
4 , damp inside won't be sorted by doing a reseal outside , it will just carry on rotting away inside .
5 , have a look at this repair http://www.girvan.f2s.com/index.html for the fixed front window .
atb
Wizard
|
19/8/2010 at 9:58am
Location: None Entered
Outfit: None Entered
 View Profile
 Reply
Reply
 Quote
Quote
|
Joined: 04/8/2010 Standard Member
Forum Posts: 27
| Site Reviews Total: | 0 |
|
| Site Reviews 2024: | 0  |
| Site Reviews 2023: | 0  |
| Site Reviews 2022: | 0  |
| Site Reviews 2021: | 0  |
| Site Reviews 2020: | 0  |
| Site Reviews 2019: | 0  |
| Site Reviews 2018: | 0  |
|
| Site Nights 2024: | 0 |
| Site Nights 2023: | 0 |
| Site Nights 2022: | 0 |
| Site Nights 2021: | 0 |
| Site Nights 2020: | 0 |
| Site Nights 2019: | 0 |
| Site Nights 2018: | 0 |
|
Right for anyone follwing this thread I appologise for the time in between my updates, but I am nearly done with the rebuild now.
In my previous post I had finished at the point of following the damp, any way much more damp following carried on afterwards:
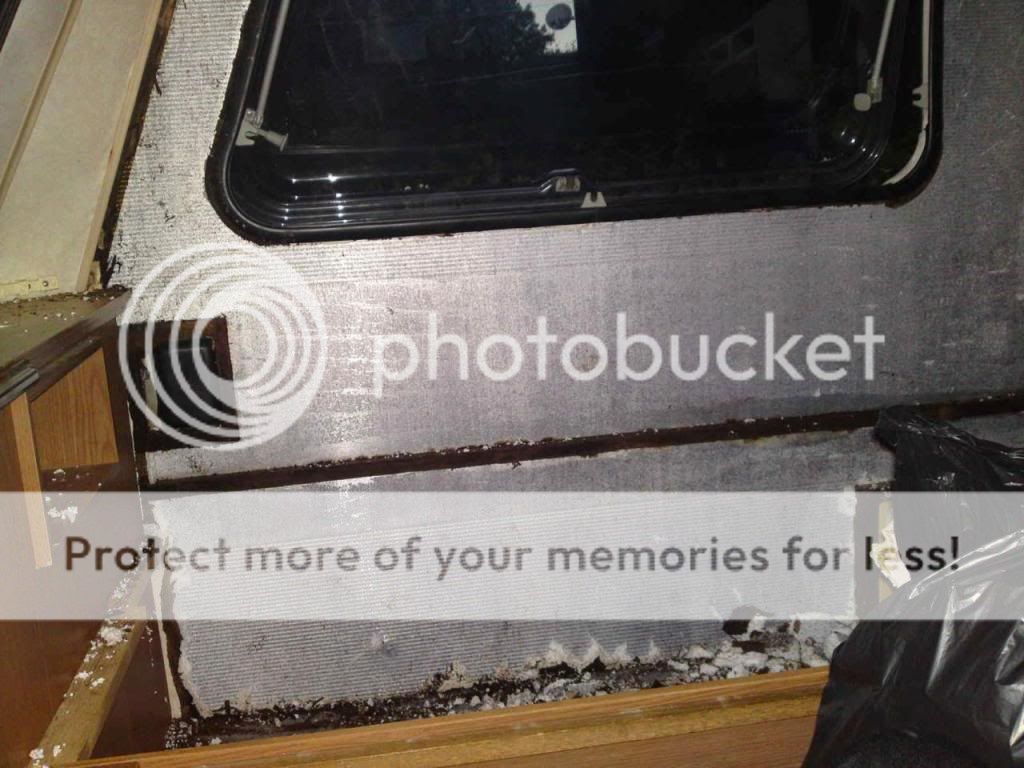
I cleared right into the corner and started to realise that the damp had spread/started around the front window, so I proceeded to pull the front of the caravan to bits

After removing the soggy hardboard around the window frame I had to go about removing the lower furniture, the cupboard and frame work that the bench screws to, I could not find an easy way to do this and at the time I did not want to take the front of the caravan off.
After further investigation I decide the only way to get to it is to take the front off, So I take the lower rails off, remove all the staples and panel pins, remove the lower panel and this is what we have:

I remove the wooden support and out falls what seems to be an endless stream of broken/rotted timbers including a major piece that looks like it used to be quite round and shaped the front corner of the caravan, but now resembles a jagged peice of black wood!! (more on this later).
Next I pop out the front window hoping to find the end of the damp, praying I dont have to remove the entire front of the caravan, luckily my prayers get answered and the damp has only spread about half way across the window.
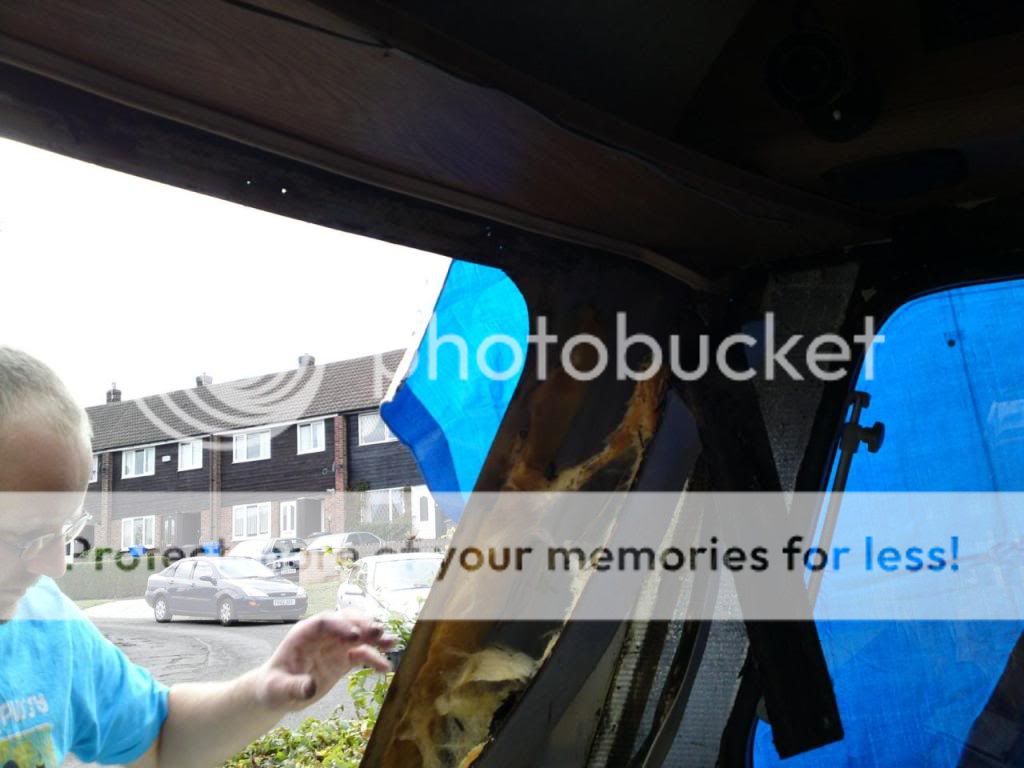
After finding the end of the damp (around 25hrs work has now been put in), I start to feel relief, all the front window frame is wood hardened/repalced, then glued/screwed back into place. I also replaced all the upright timbers with new(as can be seen) as all that was left of these were black marks on the caravan skin and lots of black flakes on the floor.

|
19/8/2010 at 10:23am
Location: None Entered
Outfit: None Entered
 View Profile
 Reply
Reply
 Quote
Quote
|
Joined: 04/8/2010 Standard Member
Forum Posts: 27
| Site Reviews Total: | 0 |
|
| Site Reviews 2024: | 0  |
| Site Reviews 2023: | 0  |
| Site Reviews 2022: | 0  |
| Site Reviews 2021: | 0  |
| Site Reviews 2020: | 0  |
| Site Reviews 2019: | 0  |
| Site Reviews 2018: | 0  |
|
| Site Nights 2024: | 0 |
| Site Nights 2023: | 0 |
| Site Nights 2022: | 0 |
| Site Nights 2021: | 0 |
| Site Nights 2020: | 0 |
| Site Nights 2019: | 0 |
| Site Nights 2018: | 0 |
|
Now the rebuild can officially begin, I start by reconstructing the roundish front piece that had rotted.
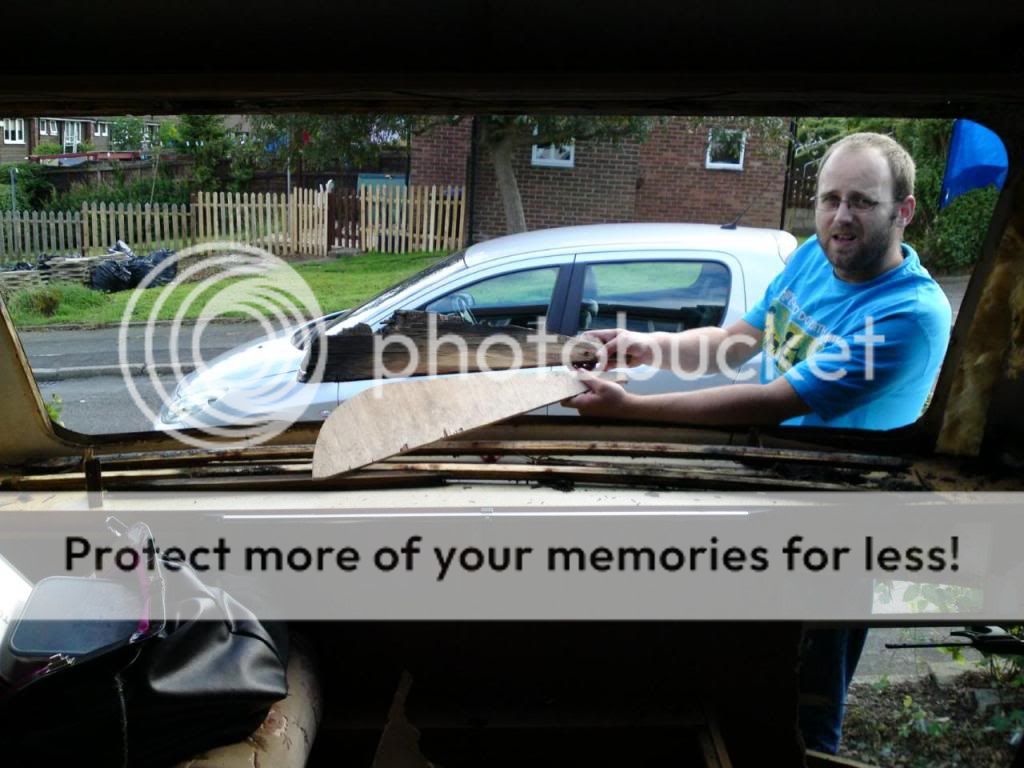
Once that is completed I reassemble the lower front of the caravan, and realise that the rounded bit I made is possibly slightly the wrong shape, by this point its too late as its glued, nailed and screwed in place. It only became aparent when refitting the rounded small rail that I hade accidentally changed the shape of the van a little, at this stage I did not want to rip it all back out so I filled the small gap with sealant.
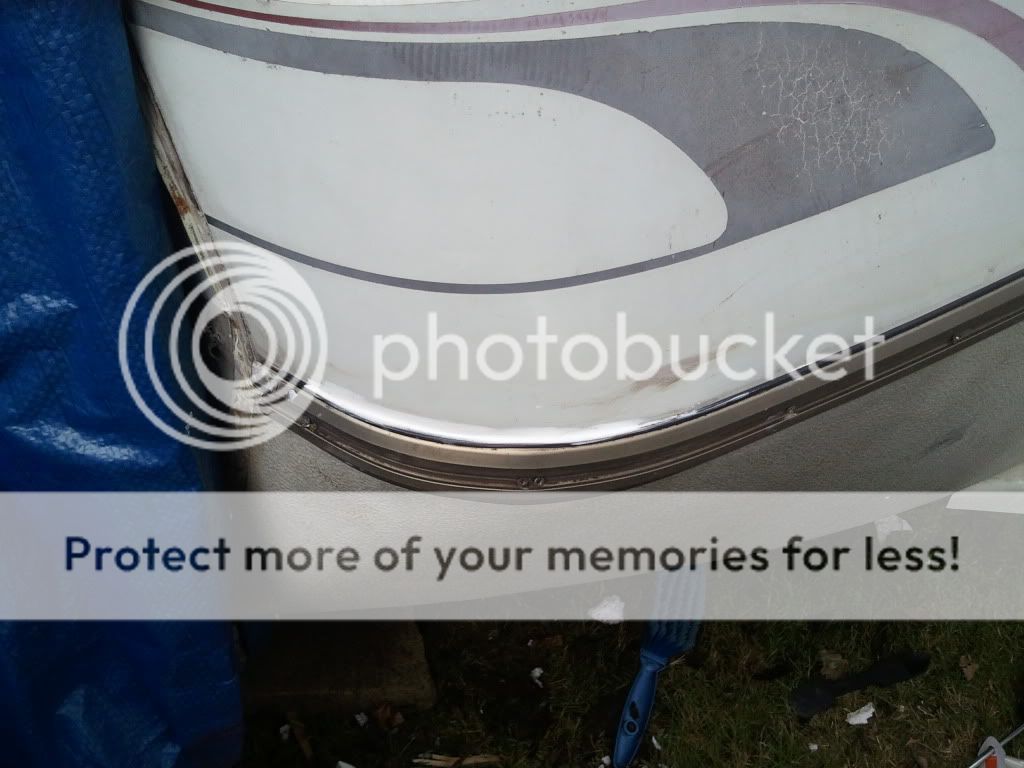
Next on my list is the replace the awning rail I had to remove, after about an hour of scrubbing, I finally get both surfaces clean, replace the rail, with fresh mastic and use fresh screws. (sorry for no picture during there was only myself at the time)
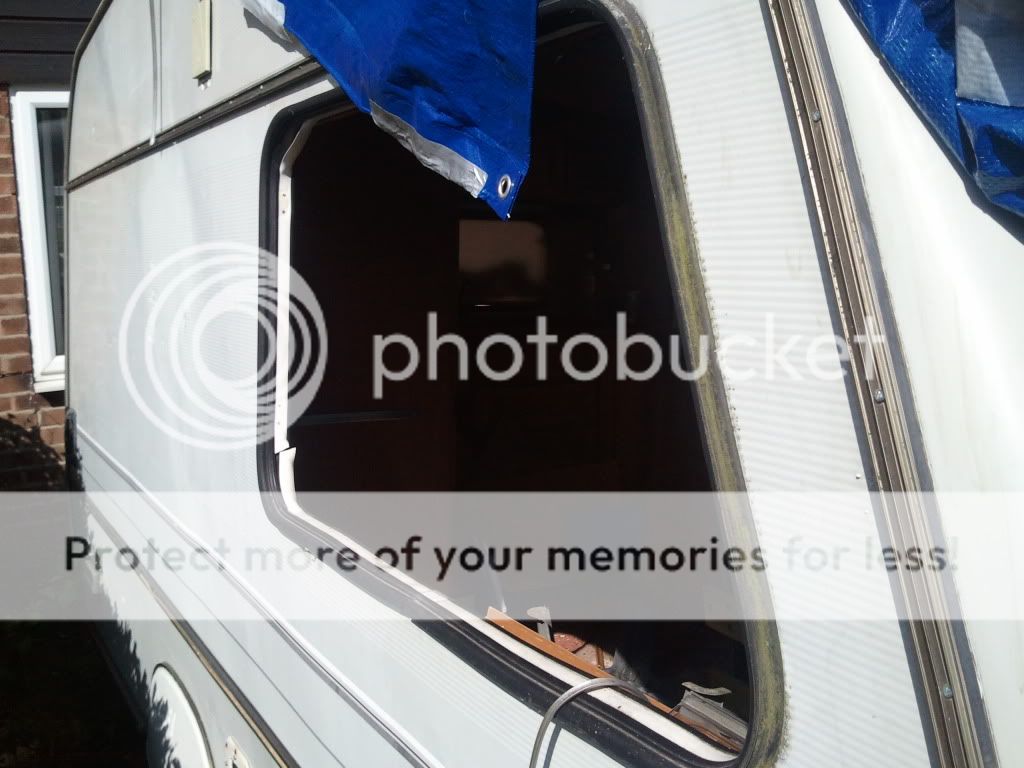
Now I have the caravan back in a sturdyish state (side wall still flappy though as its just bare skin), I attempt to get the window in, and what a total pain in the backside that was, it took around 2 hours 6 attempts and a powerplane later and we finally manage to get it in.
I next re-hardboard the window frame, and tidy up the area, and finally start to rebuild the bare skinned wall (after wood hardening all timbers) I stick the polystyrene on with no more nails left overnight.

Once dry I apply a 3.5mm plywood skin, and glue with no more nails on the polystyrene bits and with sikaflex221 on the wood-wood parts, I then replace the lower cupboard/cubby hole type thing (I had to break the plywood veneer on this when I was removing it, so it now has a crack down it which I sould be able to cover with some vaneer)


Once I have reboarded all the walls, glued and dried, I replace the bunk, glue screw and rivit it back into place and now things are looking good again.

|
|


