Joined: 06/1/2013 Diamond Member 
Forum Posts: 2130
| Site Reviews Total: | 7 |
|
| Site Reviews 2024: | 0  |
| Site Reviews 2023: | 0  |
| Site Reviews 2022: | 0  |
| Site Reviews 2021: | 0  |
| Site Reviews 2020: | 0  |
| Site Reviews 2019: | 1  |
| Site Reviews 2018: | 0  |
|
| Site Nights 2024: | 0 |
| Site Nights 2023: | 0 |
| Site Nights 2022: | 0 |
| Site Nights 2021: | 0 |
| Site Nights 2020: | 0 |
| Site Nights 2019: | 7 |
| Site Nights 2018: | 0 |
|
Sikaflex??
You got money to burn...???
I've just resealed the WHOLE of our van using PU18.
It's cheaper than sika' and does exactly the same job.
You'll also hear some on here recommending PU18 instead of sikaflex, which is why I used it....
As for rail removal...
Take out the 'Herzim strip', the coloured stuff in the rail insert, Remove the screws, you may need to grind a few of their heads off if they've rusted.
Start at one end and start prying the rail away from the van. But make damn sure you don't bend it which is easily done!! 
Using white spirit, clean down the surface of the van where the rail was. I used a combination of white spirit, a razor scraper and loads of cloths as it can get messy!
After the clean down of both the van and rails, wipe over with either meths or brake and clutch cleaner. This will remove any oily residues from the white spirit and old sealant(s).
With the rail, there seemed to be a 'void' along it. I filled this in (pressed in) with mastic seal strip.
I then ran a generous* bead of PU18 along the van where the rail will be going.
When refitting the rail use stainless steel screws. (I used 30mm ones).
Also, if the screws don't 'bite' back into the olds holes, don't be frightened to drill a new one next to the old one.
*I said generous, as once it's all back together, and the excess has squeezed out, just wipe it over and smooth out the excess.
Job done. You'll find it's more time consuming than anything else.
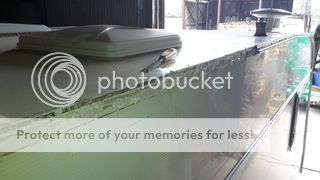
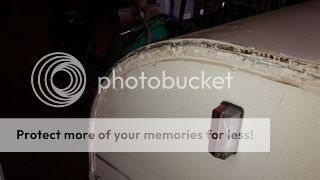
An example of possibly what to expect....
  [/IMG] [/IMG]
  [/IMG] [/IMG]
As said, 'messy'.... 
-------------
Damned if I do...
Damned if I don't!!!!
|


 [/IMG]
 [/IMG]


